How to Install Printer on Chromebook: A Step-by-Step Guide
Are you trying to install a printer on your Chromebook, but not sure where to start? Adding a printer to your Chromebook is a straightforward process, but it may require some troubleshooting if you encounter compatibility issues. In this article, we'll walk you through the step-by-step process of installing a printer on your Chromebook, as well as provide some additional tips and troubleshooting solutions.
Step 1: Check Printer Compatibility
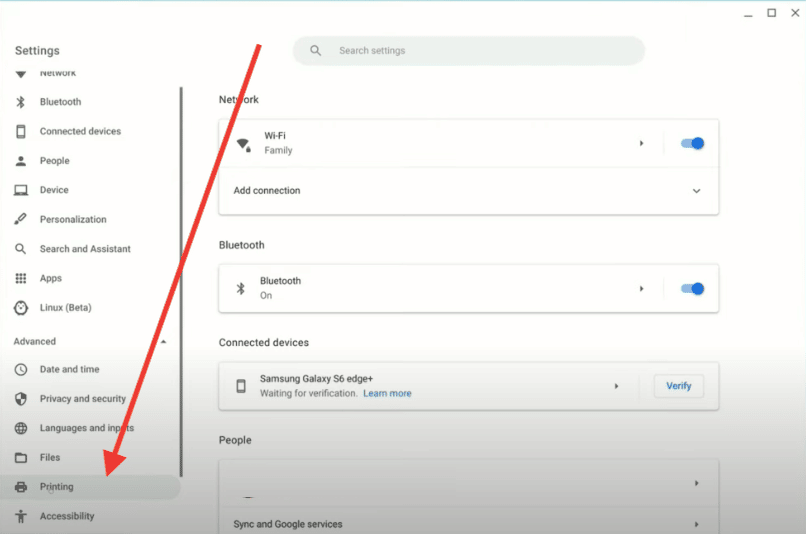
Before you start the installation process, it's essential to check if your printer is compatible with your Chromebook. Google maintains a list of supported printers that can be found on the Chromebook website. You can also check the list of supported printers by going to your Chromebook's settings menu and selecting "Printing under Advanced options." If you can't find your printer in the list, you may need to manually add it.
Step 2: Add Printer Manually
If your printer is not listed in the supported printers list, you can add it manually by going to the "Add printer" option in the settings menu. To do this, click on the time in the lower right corner of the screen, select "Settings," and then click on "Advanced options." From there, click on "Printing" and select "Add printer."

As we can see from the illustration, Install Printer On Chromebook has many fascinating aspects to explore.
Step 4: Connect Printer to Chromebook
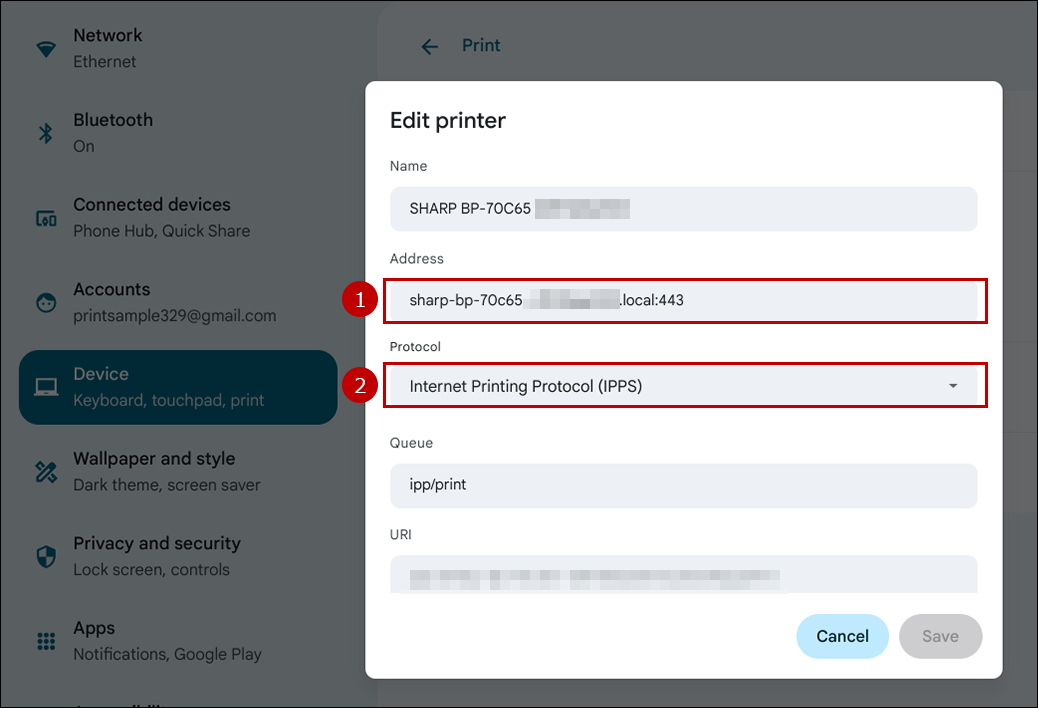
Once you've selected your printer, you'll need to connect it to your Chromebook. If your printer is connected to the same network as your Chromebook, you may be able to print wirelessly. If not, you may need to connect the printer to your Chromebook using a USB cable.
Step 5: Test Printing
Once you've connected your printer to your Chromebook, it's time to test printing. To do this, open a document or image that you want to print and click on the "Print" option. Make sure that your printer is selected as the default printer, and then click on "Print." Your document or image should now print on your printer.
While installing a printer on your Chromebook is typically a straightforward process, you may encounter some issues along the way. Here are some troubleshooting tips to help you resolve common problems:
If your wireless printer is not detected by your Chromebook, try restarting the printer and your Chromebook. You can also try disconnecting and reconnecting the printer from your network. If none of these solutions work, you may need to use a USB cable to connect the printer to your Chromebook.
Printer Not Listened in Device List
Additional Tips
Here are some additional tips to help you install and connect a printer to your Chromebook:
If you're having trouble connecting your printer wirelessly, try using a USB cable to connect the printer to your Chromebook. This can help resolve issues related to network connectivity.
Such details provide a deeper understanding and appreciation for Install Printer On Chromebook.
Check Printer Compatibility
Make sure that your printer is compatible with your Chromebook before you start the installation process. You can check the list of supported printers on the Chromebook website or by going to your Chromebook's settings menu and selecting "Printing under Advanced options."
Reinstall Printer Drivers
If you're experiencing issues with your printer drivers, try reinstalling them. You can do this by going to the printer's settings menu and selecting "Restart printer" or by uninstalling and reinstalling the printer drivers using the Chrome OS settings menu.
Conclusion
Installing a printer on your Chromebook is a straightforward process, but it may require some troubleshooting if you encounter compatibility issues. By following the step-by-step guide outlined in this article, you should be able to add and connect a printer to your Chromebook and start printing wirelessly or via USB. If you encounter any issues, refer to the troubleshooting tips outlined above to help resolve common problems.


 | HP® Support")

